Kay's Picks

    ↓ WHY I USE iHerb ↓


    Wonderful Readers!

    NETWORK READERS

Thursday, December 9, 2010

GUIDELINES FOR VOLCANO SAFETY

Bookmark and Share
It is best for people that live near a volcano to make plans for an eruption. Learn the alert levels issued by your local emergency management office and know what they mean. Listen for emergency updates and instructions, making note of information about hazards you may encounter. Prepare for a possible evacuation. Make additional preparations to shelter in place.

A volcanic eruption can alter the landscape in ways that are difficult to imagine. Near the site, there can be loss of life, and destruction of structures and property. The resulting ash cloud can cause airports to shut down and turn daylight to darkness. Earthquakes, flash floods, wildfires, thunderstorms and tsunamis can all occur as the result of a volcanic eruption.

Memorize the recommended evacuation routes. Maps marked with this route should be kept in each car and another in your home. Select maps with detailed geographical markings of the area surrounding your location. In the United States, hazard zone maps can be secured from the U.S. Geological Survey that will show probable lava flow paths and give time estimates on travel to certain locations along with their relative safety.

Prepare a getaway kit. Include safety goggles and dust masks or bandannas to protect your eyes and lungs from falling ash. Include long sleeved shirts, long pants and sturdy footwear. Keep a well-stocked first aid kit, blankets and warm clothing in a convenient location. With this, keep a battery-powered radio and fresh batteries so that you can still monitor alerts if your power goes out.

Unless you need to evacuate, stay indoors. Bring pets inside and move livestock into shelters. Close all vents, doors and windows for protection from ash and burning cinders. Put damp towels under doorways. Cover downspouts, machinery, electronic devices and computers to protect them from ash that can disable and clog machinery and pipes.

Listen for creaking noises from your roof. Ash will fall silently and can cause the roof to collapse under its weight. Remember to wear a mask and goggles if you go outside to clear ash off of the roof and gutters. Remove your clothing before re-entering the house rather than bring ash inside where it can irritate the airways of everyone indoors.

Keep at least three days worth of water and food in your home. An eruption can contaminate water supplies and you may have to rely upon what you have stored. If you hear that an eruption is imminent, fill all sinks, tubs and containers with water. Rely upon your stored water until your regular source is deemed safe.

If you must drive, use your headlights, proceed slowly at about 35 mph and watch your gauges for signs of an overheating engine. Ash can clog your radiator and other moving parts of an engine. Ash will also make roads slippery. When parked, cover your vehicle with a tarp and place it under a shelter to protect it from the falling ash.

If you must evacuate, turn electricity and gas off at the mains before you leave. Head for higher ground and try to stay upwind so that ash and gases are blown away from you. Volcanoes’ greatest dangers (lava flows, mudflows, poison gases and flooding) all move towards low-lying areas. An elevated area gives you greater protection than any attempt to outdistance the danger.

Afterwards, don’t return home until authorities say it’s safe to re-enter the area. Seek medical treatment for any injuries. The wait for medical treatment will be shorter for those farther away from the disaster site. When cleaning up property after an eruption, dampen the ash before sweeping or shoveling the buildup. This keeps the slippery substance from getting tossed back into the air.

Remember, in the event of an eruption, you may have only moments to react. Being prepared to move quickly and decisively can mean the difference between life and death.


This 4 minute video shows the extent of the destruction
caused by the eruption of Mount St. Helens.


This 17 second video shows Mount St. Helens
erupting in slow motion.

The entire side of the mountain slides to one side.

read more “GUIDELINES FOR VOLCANO SAFETY”

Tuesday, November 23, 2010

DANGERS DURING A VOLCANO

Bookmark and Share
A volcano is a mountain that opens downward to a reservoir of molten rock. When pressure from gases and melted rock becomes strong enough, the mountain erupts in an explosion that spews gases and rocks through the opening. Volcanic blasts can devastate miles of landscape within hours or minutes. Here are some of the things to watch for during a volcanic eruption.

An ASH CLOUD can turn day to night and prevent you from being able to recognize landmarks, coating everything it touches with a dark powder. It is made up of bits of glass and exploded rocks made under extreme temperatures. This corrosive substance does not dissolve and can damage mucus membranes, irritating skin and eyes. Infants and those with breathing problems are most at risk of injury from this. Cover your eyes, nose and mouth.

FALLING ROCKS (pyroclastics) can land miles away from the volcano. Place a ridge line between yourself and the volcano or hold something (backpack, box, trash can lid, your arms etc.) over your head for protection.

FIRES occur wherever burning debris lands onto tinder, spreading quickly.

FLOODING & MUDSLIDES kill more people than the initial blast. Even miles away, these are a danger as normal waterways are clogged or changed by the lava flow, ash and debris.

HEAT is also released with temperatures high enough to burn human flesh. Move away from the blast area to avoid this.

LAVA FLOWS are super-heated molten liquid. Nothing can stop them. Don’t attempt to cross them even if they appear cooled. This could be a thin crust that will give away under your weight. Never try to cross hot spots, mud holes or geysers as the ground surrounding them can be too thin to keep you out of the molten lava below.

POISON GAS and volcanic smog (vog) is the result of sulfur dioxide and other pollutants reacting with oxygen, moisture and sunlight. It can cause lung damage, breathing difficulties, headaches and death. Use a respirator, mask or moist cloth and get away from the area as quickly as possible. DON’T KNEEL OR CRAWL!!! The most dangerous gases often accumulate near the ground.

STRONG WINDS follow an eruption and can be felt miles away from the blast, knocking over trees and structures.

If you live in the vicinity of a volcano, NOW is the time to develop a plan to deal with events in case of an eruption.


Many Indonesians died in the aftermath
of Mount Merapi's eruptions
during October & November 2010.


read more “DANGERS DURING A VOLCANO”

Wednesday, November 10, 2010

DVD REVIEW: "NAKED INTO THE WILDERNESS"

Bookmark and Share
Readers may be interested in seeing an example of how rustic skills can serve you. NAKED INTO THE WILDERNESS gives a good overview of how this is possible. It’s one thing to know how to start a fire or build a shelter, it’s quite another to know how to have a shelter, fire and food without ready-made tools. There’s another level of skill required to know how to utilize the strengths of each individual within a group, take advantage of found materials and manage the variables that weather and terrain can toss your way.

NAKED INTO THE WILDERNESS is a video that demonstrates how primitive skills can be applied in their context. To emphasize the value of each technique, the participants venture into a remote location without iron tools or containers.

Part one takes you into the Kansas woods as you observe skills in several categories. Watch as the individual participants form into a cohesive group, securing food, shelter and the tools they need to accomplish each task.

While stone tools make for a slower work pace, you'll see that a LOT can be accomplished with very few basic materials. Watching this gave me a real appreciation for some skills that modern culture seems to have left behind including:
● basket making
● pottery
● fire-starting
● cooking over an open fire,
● stone knapping to make knives, axes and arrowheads
● cordage
● shelter construction
● foraging
● trapping
● and more

The second part of the video shows another group camp that utilized modern bedrolls and pre-made primitive gear. This footage has some scenes that show how "down time" is used by members of the group to make improvements to the camp. Additionally, there are scenes that show some lighthearted moments. Day 4 contains some silliness as a couple of the guys decide to try swimming in frigid waters. If you'd prefer to pass on some back nudity, skip that section.

The DVD is divided into topical chapter headings so that you will be able to review applicable sections. If you are practicing individual skills, it helps to see them demonstrated in a real life setting -- although this is not a detailed instructional video. You'll also get a pretty good idea of how to prioritize tasks and divide the labor among individuals. NAKED INTO THE WILDERNESS leaves you with an appreciation for how a small tribe or community with few materials and some knowledge can greatly enhance the life of all its members when they are willing to work together.

This is a valuable addition to your library and will work well as a gift if you are interested in these skills for personal use or for demonstration purposes. The production value is not up to the polished standards of a professionally produced work. This is not a video on how to be rescued when lost. Rather, you’ll be invited to enjoy the home movies of experts in primitive skills and gain from their insights. In spite of surface noise distractions, dead air and the occasional “is that thing on?”, there’s a lot to glean from this footage. NAKED INTO THE WILDERNESS takes you from theory to implementation of skills you’ll need to survive in primitive conditions.


Available at Bulk Herb Store.
Click on the image to order.

read more “DVD REVIEW: "NAKED INTO THE WILDERNESS"”

Saturday, October 23, 2010

FASHION SAFETY FOR WOMEN TRAVELERS

Bookmark and Share
A woman’s travelling attire affects her safety and her social interactions. When a woman presents herself in a way that suggests she isn’t carrying valuables and won’t easily be subdued, she can reduce the chances that she will be accosted. It is worth your time and effort to avoid looking like someone that might invite unwelcomed advances.

NO FLASHY JEWELRY
Wearing expensive jewelry when traveling can make you an attractive target. You could be injured if a thief were to grab a chain from your wrist or neck. A diamond ring may attract unwanted attention. If you MUST wear jewelry, choose something pretty that clearly has no value and turn your ring so that only the band shows.

FOOTWEAR
Choose comfortable, flat shoes that make it easy for you to run. You need shoes that protect your feet and allow you to move quickly. Select comfort and practicality over looks.

RESPECT FOR LOCAL SENSIBILITIES
Be aware of local customs when you travel. You are a guest where ever you go. Dress like one. The locals have had generations to develop a way of dressing that suits the climate and the culture. Learn from their example. Find out what is appropriate apparel for the places you are visiting.

Be modest, casual and comfortable. Consider how you might appear to a predator. Women wearing tight clothing, revealing tops and shorts can invite scrutiny from undesirable characters, lewd comments and attempts to look down shirts. Scantily clad women can also be offensive to residents. When it comes to safety, how you look is more important than your intent.

COVER UP
It isn't necessary for a female traveler to cover her head in most places, but there are places where having a covered head means you will get help easier should you need it. When in doubt cover your head. Lay aside opinions about appropriate dress and carry a bandana, scarf or crushable hat. A willingness to cover can convey respect, prevent prying eyes, and help avoid unwanted attention.

In some communities, bare arms and legs are only acceptable during swimming. A lightweight long-sleeved shirt, jacket or sweater can be wrapped around your waist. It will be available for sun protection or warmth and is easily removed when not needed. If you find yourself in a place where bare arms aren’t permitted, you’ll have a quick and easy slip-on solution.

A scarf shows its versatility in this regard. A scarf can be used as a head covering, a shawl or a shrug. If it’s long enough, it can cover your shoulders and your head. A silk scarf can even double as a cover for your motel pillow. In a pinch, it can be folded and used as a sack to carry items.

THINK BEFORE YOU GO
Dressing for safe travel won’t cost you a lot of money, but the time you invest in selecting your garments carefully can be priceless. Instead of drawing unwanted attention, remember that it’s more important to your loved ones that you arrive safely.


In the following clips, Kirsten and Liz discuss how women can dress for safety when traveling. Bulk Herb Store’s Shoshanna demonstrates many ways to accessorize with a scarf.


read more “FASHION SAFETY FOR WOMEN TRAVELERS”

Thursday, September 30, 2010

FIVE POINTS FOR PERSONAL SAFETY

Bookmark and Share
Personal safety has a lot to do with not taking unnecessary risks. While there’s no guarantee that you will never be in an emergency situation, you can take steps to discourage attackers and make rescue more likely. This is an abbreviated list of some things you can do to stay a little safer as you move from place to place.

PREPARATION
• Leave written details of your travel plans with two trusted friends who will notify searchers if you deviate from your itinerary.
• Carry a noisemaker like an electronic device, personal alarm or a whistle. If you have one, use the car alarm button on your key chain.
• Carry a heavy duty flashlight, pepper spray, or even a walking stick. Check laws in your area. In the event of an attack, be prepared to use your choice of device or it could be used against you.

POCKETS
• Avoid carrying a purse or wallet. These are targeted by thieves.
• Use several front pockets for valuables to avoid total loss if robbed.
• Keep emergency money in unexpected places such as shoes, bra, money belt, etc.
• Carry purse or backpack on arm opposite the roadway to make it more difficult for a motorist or bike rider to grab.

PEOPLE
• Walk with confidence keeping your head up, eyes at nose level, alert and with purpose. Attackers look for easy, fearful targets.
• Don’t engage in conflicts that can escalate into physical contact. Criminals sometimes work in packs and try to manipulate someone with a quick temper into striking first. Later, they claim that their assault on your person was self-defense. When you have the option, walk away rather than fight.
Don’t travel alone. Have at least one other person for a walking partner.
• Treat people with respect. Arrogant strutting alienates people that could help you.
• Be willing to learn. Ask questions, seek advice from locals.
• Express gratitude. Say thank you.
• Don’t wear expensive clothing and jewelry unless necessary.
• Avoid drawing attention to breasts, belly or thighs by wearing garments that expose them. Wise clothing choices keep you from being overly attractive to predators and give you freedom to access more locations that may have a dress code. Collared shirts (not sleeveless) and long pants are a good choice for men.

PLACES
• Be aware of your surroundings. Dark lonely places are best avoided. Stay in well lit, populated areas. This is a safer route, even if it takes a bit longer.
• If you see criminal activity occurring, leave the area. Some authorities arrest everyone and ask questions later.
• Public transportation and crowded areas require heightened awareness. These places allow people to jostle and bump into you – perfect opportunities for a thief.
Don’t tune out. Wearing a headset cuts you off from your surroundings, making it easy for an attacker to sneak up on you. When walking alone, don’t listen to electronic devices.

PROTECTION
• Learn some simple, easily performed defense tactics. You don't need to know how to beat an attacker, only how to buy yourself enough time to get away.
• MAKE NOISE if assaulted. Attackers hate attention-making noise. Don't underestimate the power of one person who may come to your aid if they hear you.
Practice yelling at top volume. Tell what is happening, give lots of details and describe your attacker while yelling “Call 911!” Repeat these as often as possible as a command. Witnesses don’t always know what to do and are more likely to respond to instructions than to pleas for help. Your assailants may be so stunned to hear you describe them that they run away.


These short videos below feature Captain Steve Pearl
who elaborates on more safety measures that anyone can employ.


read more “FIVE POINTS FOR PERSONAL SAFETY”

Sunday, September 5, 2010

MAGNESIUM FIRE STARTER STICKS

Bookmark and Share
Magnesium fire starter sticks can help you get a fire going, even in wet conditions. The shavings burn hotter than 1,000°F. This tool is small enough to be kept on a key chain and weighs less than 2 ounces. Similar motor skills as those required to strike a match are all that the user will need to get a spark. Magnesium fire starters respond well to a light touch and finesse rather than blunt force. If the first effort fails, enough magnesium remains on the stick for a few hundred more tries. For these reasons, I think it is an ideal tool for women and children as well as men.

There are three basic components to a magnesium fire starter stick: magnesium, flint and carbon steel. The large, light grey portion is the magnesium. The narrow dark cylinder embedded in one side of the magnesium is the flint rod. The third part of the tool is a separate piece of carbon steel that resembles the blade of a jig saw.

To get a fire started, use the toothed edge of your saw to peel some shavings onto the finest fibers in your tinder nest. Try not to gouge chunks out of the bar. The thinner the shavings are, the easier they are to ignite. Work in an area protected from gusts of wind as these shavings are feather light. If using a knife, utilize the back edge so that you don’t dull the blade of an important tool.

Some instructions recommend creating a dime-sized pile of shavings, but with a well constructed tinder nest, you’ll likely need less. A pile of shavings equal to the size of a pencil eraser may be enough. I recommend that you start with the smaller size and add more shavings if necessary. In this way, you are able to extend the life of your tool.

Hold the magnesium starter in your less dominant hand with the dark flint bar turned upward. Hold the saw blade in your dominant hand, pinching the flat of it between your thumb and forefinger. The narrow edge of the blade will extend just beyond your fingers. Run the short side of the carbon tool across the flint in a downward stroke towards your tinder nest and magnesium shavings. You should immediately see sparks. If they don’t immediately catch, move your hands closer to the magnesium shavings so that there is a better chance of ignition. Hesitate long enough between strikes to check your tinder for a flame.

Another way to coax a spark is to hold the jig blade steady and pull the flint towards your body as you scrape it across the blade, directing the sparks into your tinder bundle. Experiment with both methods to see which is most comfortable and effective for you.
Neither shaving the magnesium nor striking the flint will require you to etch deeply into your tool. If you aren’t having good success and notice that there are deep gouges or an edge that’s worn flat, try a lighter touch.

CAUTION:
Don’t risk holding the tinder nest in your hands when striking a spark with magnesium. It burns so hot that a flaming piece of magnesium could easily burn through human skin all the way to the bone. Instead, allow the magnesium shavings to flare and catch the tinder. THEN you can hold the nest and gently blow, feeding the flame vital oxygen.

Remember, the adrenaline rush of urgent circumstances can decrease fine motor skills, so take the time to get familiar with your fire stick before there is an emergency. Magnesium fire starter sticks can be found at most outdoor retailers for $2 or less. Purchase two of them and practice with one until you are comfortable with it. This small investment of time and money has the potential to save your life.


Here’s a video demonstration of how to start fire using a carbon steel knife with a magnesium fire starter. I don’t recommend gouging at the magnesium in this way, but the process is forgiving and worked for him.

read more “MAGNESIUM FIRE STARTER STICKS”

Saturday, August 28, 2010

HOW TO BUILD A TINDER NEST

Bookmark and Share
Other names for tinder nests are tinder bundles or bird’s nests. Your tinder nest will be used to coax a spark or ember into flame. It maximizes your chances of success in building a fire. Once the nest is burning it is used to start a larger fire.

To construct a tinder nest, select dry and flammable materials. A variety of items can be used from clothes dryer lint, fuzz from socks and sweaters, to foraged materials. Many outdoor enthusiasts carry waterproof containers filled with cotton balls dipped in petroleum jelly for this purpose. Found tinder can include dry grass, cattail fluff, cottonwood down, leaves, thin layers of tree bark, moss, wood shavings, brown leaf litter, dropped pine needles and more. A found bird’s nest will work well also.

Dry tinder will break easily when bent or crushed. If the exterior feels dry, but it gives rather than snaps when bent, the material isn’t truly dry. If the ground is damp, search out materials that are found resting on top of bushes or limbs. These items will be drier than ground litter because they have been exposed to the sun and air.

Place damp tinder inside your jacket, but not next to your skin. By the time you are ready to start a fire later in the day, the tinder will have been dried somewhat by your body heat.

Shredding the tinder creates additional surface area that will more easily catch flame. Materials that are fuzzy are ideal for feeding a spark. Gather the tinder on a bandanna or other cloth. Grab a length of tinder in both hands and move your fists in a bicycle pedaling motion. Work over the entire length of the tinder. The tinder will soften and become pliable. Bits and fine dust will fall down from your hands and be caught on the bandana.

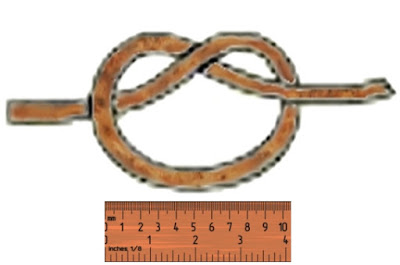
Take some of the coarse pieces of prepared tinder and create a loose over hand knot with a diameter of about four inches.

Stuff the remaining tinder into the knot’s loop. Keep stuffing the nest until it is dense. It must be able to prevent the coal from falling through the fibers and out of the nest and it must provide enough fodder to keep the spark from fizzling out before a flame starts.

Collect the dust that has fallen into your bandanna and place it in the center of the nest. It will help if you first make a small hollow or depression in the center of the nest to contain the dust. As you pick up the dust you will notice that the finest particles fall back down onto the bandanna. This will mean that you'll be packing finer and finer dust into the nest’s depression until the finest dust will be on the top, just where you'll place the spark or ember.

Once your nest is assembled, keep it in a protected area where it won’t be bumped or blown around by the wind. Then assemble the fuel for your fire and prepare to strike a spark.
read more “HOW TO BUILD A TINDER NEST”

Tuesday, August 17, 2010

SIGNS OF DEHYDRATION -- WHY YOU NEED WATER

Bookmark and Share
The human body can live for approximately 3 days without water, but this doesn’t mean it will be functioning at full capacity. Dehydration is the condition that exists when your body begins to lose more water than you drink. The body looses water primarily through perspiration, respiration and elimination of waste. Long before you feel thirsty, you can actually begin to dehydrate. Even slight dehydration will impair your health.

Diuretics such as alcohol, beer, coffee, tea and caffeine increase the amount of water lost in these natural processes. Drinking salt water increases the amount of salt in your body and forces fluids from your organs in order to dilute it. This diminishes your body’s fluids at a greater rate than if you hadn’t drank anything.

Without the proper amount of water, metabolic processes slow. The water content of your blood decreases and it thickens to the consistency of sauce. This increases the strain on your circulatory system. Blood pressure can fall to dangerously low levels. Blood clots may form. Normal kidney function can be impaired.

Fatigue and thirst occur if the water content of your body drops by only 2%. Other symptoms include things like lethargy, headaches, dizziness, muscle cramps, loss of appetite, mental fuzziness and depression. Any difficulty functioning emotionally or physically is made more severe by mild dehydration.

As dehydration becomes severe, your mouth will feel quite dry. This is known as "cotton mouth," and you may notice a crease forming on your tongue. The frequency and volume of urination will decrease. Your urine will take on a deep yellow or orange color and have a strong odor. As dehydration progresses, your eyes will become dry and sunken; your heart rate will increase.

In severe cases urination will stop completely. Lethargy will increase, along with irritability, and you will become nauseated. Vomiting will dehydrate you even more. Once your condition becomes severe with water levels dropping by more than 10%, a failure to rehydrate is fatal.

The time to prevent dehydration is before you are threatened with a lack of proper drinking water. Take the time to learn how to filter AND disinfect found water sources with basic tools. Become skilled in locating natural water sources. It’s not a good idea be left trying to remember untested skills and information while you are suffering from mental confusion brought on by dehydration. Not only is it frustrating, bickering among dehydrated group members with poor thinking skills can be deadly. When you find yourself in survival situation, you’ll be very thankful you took the time to see to this basic need.
read more “SIGNS OF DEHYDRATION -- WHY YOU NEED WATER”

Saturday, July 31, 2010

5 WAYS TO GET ALONG WITH DIFFICULT PEOPLE

Bookmark and Share
Some people are just easier to work with than others. In a survival situation, lives can depend upon successfully navigating a challenging relationship. These methods can help.

FIRST – REALIZE THAT YOU AREN’T THE ONLY PERSON WITH THIS PROBLEM.
Many difficulties arise when someone is convinced of his ‘chronic uniqueness.’ This is the belief that one’s history, circumstances, wants, needs, requirements and desires are so different that no one could possibly understand or be trusted to make decisions affecting him. Telling this person he is mistaken will place him on the defensive and cause more time-consuming conflict. Recognize this self-deception for what it is and avoid taking offense when you see it in others while guarding against it in your own thinking.

SECOND -- DON’T EXPECT OTHERS TO SOOTHE YOUR EMOTIONS.
Others shouldn’t have to listen to you whine. It sounds harsh, but lives could be at risk. Your companions don’t need to be reminded of your emotional turmoil at every opportunity. Your willingness to avoid complaining will add to your value as a team member. Save the details of your inner struggles for a journal. Communicate information as it is necessary. Endeavor to be an encourager. Conversing about the positive points of your circumstance is a way to redirect your thoughts while helping others.

A mural in the rotunda of Oregon's State Capitol
shows the Lewis and Clark Expedition
arriving at Celilo Falls on the Columbia River in 1805.


THIRDACCEPT YOUR RESPONSIBILITY IN THE MATTER.
If you habitually blame others for conflict, it places the group dynamic at risk. It ISN’T just the other person’s problem. Red flags that you are contributing to difficulties are if someone avoids your company, finds excuses for leaving the area when you arrive, or routinely discounts your input. If this is the case, here are a couple of steps that may help:

STEP ONE: Stop spreading the dirt.
When people discuss their difficulties with others, it is in your best interest to change the subject and not take part in such conversations. If your team member suspects you are speaking about him, it will cause a rift. This broken trust can lead to resentment that is displayed in actions and attitude. Your companion becomes just what you painted him to be by responding to your damaging words.

STEP TWO: Focus on strengths and abilities.
Look for opportunities to say something genuinely positive about your team member. Do this even if he is not within earshot. It helps YOU to take inventory of strengths and abilities rather than cataloging irritating traits. Refocus your thoughts when you find yourself falling into this habit. This will help you be less abrasive towards this person without having to put on a front.
FOURTH – DON’T OFFER PLATITUDES AND EXPECT A GOOD RESPONSE.
Many people think social niceties are essential for good group dynamics. A crumbling group dynamic isn’t helped when pleasantries are extended without underlying goodwill. Nice manners ALONE aren’t enough to smooth over serious fractures – and poor manners aren’t a serious enough offense over which to engage in a bitter battle.

FIFTH – BE WILLING TO LOSE THE BATTLE IN ORDER TO WIN THE WAR.
Often, both parties are too proud, too bitter or too hostile to reconcile their differences. Remember, the goal is to survive, not to be proven right. Don't nag or pressure others to conform to your way of thinking. It’s true: ‘A man convinced against his will is of the same opinion still’ -- AND . . . he’s pretty ticked off at being manipulated.

When you set an example of flexibility and refuse to hold grudges, you inspire others to follow your lead. Set aside behaviors that cause conflict and demonstrate your willingness to contribute to the welfare of the group. Your willingness to patiently make an effort to get along can help make the best of a bad circumstance.
read more “5 WAYS TO GET ALONG WITH DIFFICULT PEOPLE”

Thursday, July 15, 2010

GUIDELINES FOR EMERGENCY WATER STORAGE

Bookmark and Share
The human body can only survive three days without drinking water. This makes water a crucial aspect of emergency preparedness.

In most homes, nearly 25 gallons of water per day is used by each person. This includes water used for drinking, cleaning, flushing and cooking. Additionally, most of the systems which supply water to these homes are dependent on electricity. Even properties with wells often utilize electric pump systems. So, water storage is important should the power grid go down.

It is recommended that you evaluate your family’s needs for a seven day period. If you are careful with your water use, you should be able to manage with 2 to 3 gallons of water per person in very warm climates. Half of this will be drinking water. The other half will be used for cooking and hygiene. You may not drink this much water currently, but keep in mind that other sources of beverages may not be available. Additionally, you will be adjusting to living without the benefit of items like air conditioning and electric fans. You will need to replace water lost through perspiration and respiration.

If you know ahead of time that you may lose your supply of water, take the opportunity to fill bathtubs, sinks, ice chests and any other container you have that is strong enough to hold water without leaking. Separate your water into two categories: drinking and all other.

It is advisable to prepare for at least seven days without water. This means that each member of your family will need 21 gallons of water in storage. To be safe, you may wish to double this amount. A family of 5 would require 105 gallons of water in storage. Twice that amount would be 210 gallons. So, two or four, 55 gallon drums would meet your storage needs.

A gallon of water weighs a little less than 8.5 pounds. This is an important consideration for storage and transportation. Quantities of water are best stored on a reinforced concrete floor as 55 gallons of water (not including the weight of the drum) would weigh almost 500 pounds. This is too heavy for most other flooring systems.

If you are unexpectedly without water, there are places in your house that contain useable water. Most hot water heaters hold about 40 gallons of drinkable water. The tank portion of the toilet also has water that is useable for some non-drinking purposes. Ice cubes in the freezer are another source. Don’t throw away the water found in canned goods as it is another valuable source of hydration when every drop counts.

Water can be collected from downspouts or in a child’s wading pool during a rainstorm. You can leave a clean bedspread or sheet out during the rain or overnight on the grass to collect the dew. Wring it out over a storage container. Non drinking water sources include water from the toilet bowl and the waterbed mattress.

Take time now to plan ahead for possible water shortages. Get creative with ways to replenish your stored water once the faucet is turned off. Train yourself and your family members to conserve the water you DO have.
read more “GUIDELINES FOR EMERGENCY WATER STORAGE”

Friday, July 2, 2010

TREATMENT FOR SWOLLEN FEET AND HANDS

Bookmark and Share
Mobility and ease of movement are greatly impeded by inflammation and swelling. In urgent circumstances, this can be dangerous. Swelling indicates that more fluids are being delivered to the area than it is possible for your lymphatic system to carry away. Rather than leave the fluids there to stretch and strain the tissues, there is a way to reduce the swelling and recuperative time.

You can create a biological pump.

Fill a bucket with icy water and another container with the warmest water you can endure. Place your swollen limb into the cold water and allow your limb to soak for several minutes. Then move the limb into the warm water soak for several minutes. Continue to do this until you are relieved of the swelling.

I have found that inexpensive foam ice chests are useful for this application as they are large enough to hold a sufficient volume of water and maintain the heat or coolness of the water over a 30 minute session (or longer). If this is not an option in a remote location, find a container that can hold warm water and move between a cold running stream and the heated container of water. You may even substitute heated rocks wrapped in an insulating cloth as your source of warmth and a frozen towel for a cold wrap.

The point is to repeatedly cool and warm the limb. The heat draws oxygenated blood to the area and relaxes the tissue. The ice shrinks the tissues and helps move fluids away from the limb. Done repeatedly, it increases the movement of fluids away from the area, promoting healing and increasing the range of motion.

You may still need some time to regain strength in the limb, especially if there has been structural damage. However the healing will progress at a faster rate when swelling and inflammation are reduced.

Of course, the primary defense against a swollen limb is to prevent its occurrence.

Poor movement mechanics and a lot of sitting can lead to a tendency towards swellings. Additionally, this can contribute to arthritis pain, poor bone density and tension in the neck, eyes, and jaw. These are common symptoms among populations that have a sedentary lifestyle with brief interludes of intense exercise. In cultures that require movement throughout the day this is not the norm. The human aging process is not naturally characterized by these symptoms.

When your feet or hands swell, it is an indication that toxins and waste material have accumulated in the area. With the regular use of your muscles, the circulatory and lymph systems can become healthy enough to flush the area free of toxins and bring nourishment to the tissues. Not using muscles means that these functions cannot be carried out as they were designed, and this makes you prone to injury and disease.

The good news is that the function and health of your body can be improved when you change your behavior with respect to the design. So, if you haven’t been utilizing muscle groups, it’s not too late to start. Your ability to take care of yourself and your loved ones is improved with physical fitness.


This guide is written for information purposes only and not meant as a substitute for skilled health care. When incorporating these methods, a reader must be informed, utilize good sense and be aware that he assumes all liability.
read more “TREATMENT FOR SWOLLEN FEET AND HANDS”

Thursday, June 24, 2010

EVALUATING CHARACTER IN A CRISIS

Bookmark and Share
When determining your options in an emergency, those who trust the all-knowing God can pray for wisdom to know the best course of action and maintain composure. Additionally, there are skills you can practice to evaluate character in a crisis.

Make mental notes of the demeanor and behaviors of anyone that attempts to take charge. Observe these things closely while discussing a topic that is not controversial. What is the tilt of the head, the posture, the position of the shoulders, arms, hands, legs and feet? How does this person stand or sit? Notice the eyes, the lines around them and the lift of the eyebrows. Notice the thickness of the upper lip and whether it suddenly becomes thinner when certain topics are broached.

Which way is the torso facing? Individuals are more likely to turn their abdomen towards someone they care for or trust. Face the person trying to persuade you and observe his stance. If he turns his shoulder towards you, this is known as giving someone the ‘cold shoulder.’ It can be an indicator that the person is uncertain of his words, or he may be hiding something. Someone who suddenly leans backwards is displaying a desire to retreat from a topic. Alternately, leaning forward during a topic can mean that the person is very interested in the subject and the person to whom they are speaking. A turn in the conversation that results in hands clasped in front can mean that the person is trying to appear smaller and retreat from the discussion.

Any change or movement away from the established baseline could indicate that you aren’t hearing the whole story.

If poor lighting prevents you from seeing, use your ears to help determine a person’s truthfulness. Listen for verbal clues that reveal the true intent.

Use of the word ‘but,’ can indicate something is hidden. Statements like, “Some people might think I’m wrong, but” raises questions about who would disagree and their reasons for doing so.

How does the person answer yes or no questions? Do you get a solid yes or no followed by an explanation? Or does the person lead with qualifications? An example might be – Question: ‘Are you telling me the truth?’ Truthful answer: ‘Yes’ or ‘No.’ A suspect answer would be: ‘I would NEVER lie to you. You know that.’

A third verbal indicator is when someone laughs when asked a serious question. ‘Are you certain this is our best course?’ followed by a chuckled ‘YES!’ is a reflexive way to cover doubts, allay fears and try to encourage the group. A more honest answer might be a sober ‘I’m as certain as I can be with my limited experience under these conditions.’ Keep in mind that a group is more easily led when a person displays confidence, so the first answer may not be a deal breaker.

A fourth verbal indicator to watch for would be the choice of words used by the individual. ‘I realize you aren’t convinced that I’m being honest with you,’ contains the phrase ‘I’m being honest with you.’ The statement, ‘I understand it’s easier for you to think that I would lie to you,’ has the phrase ‘I would lie to you.’ These are unintended keys to the truth. The first statement is likely a truthful one while the second statement is suspect.

These helps aren’t comprehensive. Used alone, they aren’t enough reason to ignore sound advice – even if it comes from a less than honest person. Like doctors delivering bad news, an individual may simply loathe to tell you the full story, believing it best not to worry you. Consider the whole picture and what you know of the character of the person before deciding whether to follow. Nevertheless, it helps to know when a person is being forthright.
read more “EVALUATING CHARACTER IN A CRISIS”

Monday, June 14, 2010

MEASURING DAYLIGHT BY HAND

Bookmark and Share
When you are outdoors or living with limited (or no) electricity, tasks are measured by how much daylight remains. Light from the sun is necessary in order to accomplish many duties. Knowing how much natural light remains in the day will tell you how to set your priorities regarding things such as shelter and fire.

This is important, especially if you are accustomed to a routine that includes things like a late evening meal with time to relax afterwards. The preparation and cleanup will best be done while the sun is still shining and you are able to see what you are doing. It is NO FUN to wake up the next day to soiled cookware because there wasn’t enough light to do the job right the night before. Ask anyone that has tried to set up a shelter in the dark, and you will quickly hear enough stories to make you want to avoid that scenario also.

To estimate how much daylight remains, locate the sun in the sky without looking directly at it. Fully extend your arm and turn your hand to look at your palm with your fingers pointing to the side. Measure how many finger-widths of space there are between the bottom edge of the sun and the horizon line. For every width of a finger you can place between the sun and the horizon, there is approximately 15 more minutes of daylight. So, if you had a single span of your hand between the sun and the horizon, there is about an hour (4 fingers X 15 minutes) before sunset.

In the morning hours this method can be used to estimate how much time has passed since sunrise. Additionally, measuring the distance of the sun from both the eastern and western horizons, will give you a good general idea of the length of time you will between have sunrise and sunset. Half of that time will give you the hours between sunrise/sunset and mid-day. This valuable tool will help you avoid becoming so consumed with any single task that you run out of time to accomplish other important things.
read more “MEASURING DAYLIGHT BY HAND”

Thursday, May 20, 2010

SWEATING IN A SURVIVAL SITUATION

Bookmark and Share
Thermoregulation is a skill that is valuable to have in an outdoor situation. Thermoregulation is the ability to keep body temperature within certain boundaries, even when the ambient temperature is very different.

A first step towards thermoregulation is to remain calm. A panicked person will have an increased heart rate and the urge to move quickly. The reason to avoid this is because heavy activity will cause the body to perspire and lose valuable water. Additionally, sweat will dampen clothing. Wet clothing will speed hypothermia after sunset, when temperatures begin to fall. This is a consideration EVEN IF you are in the middle of the summer season because evening temperatures can rapidly decline. Perspiration dampened clothing can contribute to skin irritation and blisters.

Knowing how to heed your body’s signals regarding thermoregulation is a life-saving skill. If you begin to perspire, loosen and remove outer garments. This will help keep clothing and skin dry. Watch members of your group and encourage them to remove layers also. If you find that the temperatures are very warm, a dampened cloth across your neck is one method that will help you avoid heat exhaustion.

Avoid working at full capacity as this will create a greater need for drinkable water to replace the hydration you have lost. Work at 60% of your capacity – the point just before you break into a sweat. In a survival situation, it is better to learn the art of steady, plodding activity that brings gradual results, rather than racing to finish each task.

Using this method, construct a shelter, make a fire and prepare for nightfall. When the temperatures drop, re-apply the extra clothing that was not needed during the day.


The following video by Spencer Two Dogs discusses Thermoregulation.


read more “SWEATING IN A SURVIVAL SITUATION”

Thursday, May 6, 2010

DANDELION REMEDIES AND USES

Bookmark and Share
Dandelion can be used liberally as it is non-poisonous. The roots, leaves and blooms of the plant are edible. Dandelion supports a healthy urinary tract, kidneys and liver function. When harvesting, be careful to select plants that have not been exposed to toxins or chemicals. For more information, click here.

This plant is traditionally used to support healthy liver function. Dandelion is rich in vitamin C and is useful in the treatment and prevention of scurvy. It is also useful in the treatment of skin eruptions and warts. The milky white juice that flows from the stalk can be applied directly to spots on the skin as a treatment.

Dandelion is useful in the treatment of excess fluid buildup in soft tissues. Because it replaces the nutrients lost as water passes from the body, there is not the mineral depletion associated with pharmaceutical diuretics. Dandelion is also consumed as a treatment for lung disease that is marked with wasting of the body.

Classified as a bitter herb, Dandelion is useful in the treatment of acid stomach or heartburn brought on by a lack of muscle tone. It works as a mild laxative in habitual constipation. A decoction or extract of Dandelion administered three or four times a day can help with an irritated stomach. It has a good effect in increasing the appetite and promoting digestion.

INFUSION/TEA
Pour 1 pint of boiling water over 1 ounce of Dandelion and allow to steep for 10 minutes.
Strain and sweeten with honey. Drink several glasses in the course of the day. The use of this tea is efficacious in the treatment of nausea and edema.

DECOCTIONS
This method of herbal preparation involves gently simmering an herb until the water is reduced to a specific amount.

Version 1
Place 1 pint of the sliced root in 20 parts of water and gently boil for 15 minutes. When cooled, strain the liquid and sweeten with honey. A small teacupful may be taken once or twice a day.

Version 2
Simmer 2 ounces of the herb or root in 1 quart of water until the volume is reduced to a pint.
Take this in 6 ounce doses every three hours for scurvy (caused by too little vitamin C), scrofula (lymph gland tuberculosis usually of the neck), eczema and all eruptions on the surface of the body.

Version 3
Decoction for jaundice in young children:
1 ounce Dandelion root
½ ounce of each of Ginger root, Caraway seed & Cinnamon bark
¼ ounce Senna leaves
Gently boil in 3 pints of water until reduced in volume to 1 1/2 pint. Strain. Dissolve ¾ cup honey into the hot liquid and bring to a boil again. Skim all the impurities that come to the surface when clear. Allow to cool. Give frequently in teaspoonful doses.

Version 4
Decoction for Gall Stones
1 ounce each of: Dandelion root, Parsley root, and Balm herb
One half ounce each of Ginger root and Liquorice root
Place in 2 quarts of water and gently simmer down to 1 quart
Strain. Drink six ounces every two hours.
DANDELION TINCTURE
Collect Dandelion plants (including roots and tops) from a pesticide and herbicide free zone.
Good-quality dried Dandelion may be substituted. It is best to collect more than you think you'll need because the plant does wilt during preparation. Clean the plants according to instructions found here.

Slice the roots thinly. Fill a quarter to two-thirds of a canning jar with dandelion root. Pour just enough boiling water over the herbs to cover. Then fill the rest of the jar with 100-proof vodka. Seal the jar tightly and shake to mix thoroughly.

Set the jar in a warm sunny area. The sun will not harm the tincture. Shake the jar twice daily. The tincture will be ready in two weeks. Strain the liquid through a clean cotton cloth or coffee filter. Squeeze the solid matter to express all of the liquid. Pour the tincture into a dark amber glass bottle, filling to close to the top to eliminate air exposure during storage. Cap tightly. Store in a cool, dark cabinet until needed.

Take a spoonful of the tincture every day to help with health issues.

Some individuals include the dandelion leaf as well as the root in the tincture. A tincture made from the leaves may be taken three times daily by placing 10 to 15 drops in a spoonful of water.


This article is not meant to be taken as medical advice. The information provided is for the enrichment of the reader and is not offered as a substitute for the care of a health professional. The reader assumes all liability and should use common sense and discretion when utilizing this information.
read more “DANDELION REMEDIES AND USES”

Wednesday, April 14, 2010

DANDELION: HARVEST OF HEALTH

Bookmark and Share
Dandelions are known for their dazzling yellow blossoms that give way to a globe-shaped puff ball, sending seeds floating away on the breeze. Others view this plant as a persistent weed that can invade even a well-kept lawn.

This plant has smooth, jagged-edged leaves, and hollow, milky, stems that yield a single flower. Also known as ‘swine’s snout,’ Dandelion’s green sepals encircle its closed bud producing a silhouette that resembles a pig’s nose.

Several flowers resemble Dandelions. Check the leaves and flower stems. If the leaves are hairy or the flower stems are branched -- or the root structure does not match the description of Dandelion root – you have found a look-a-like and not an actual Dandelion plant.

A nutritious food and a prized tonic, Dandelions are edible from the root, to the leaves and the blossoms. Gather Dandelion from an area KNOWN to be free of pesticides & toxic chemical contamination (avoid roadways).

LEAVES
The shape of the leaves inspired the name of this vegetable. ‘Dent du lion’ is a French phrase that means ‘tooth of the lion’ and refers to the tooth-shaped leaves.

Leaves should be harvested in the early spring before the plant blooms because that is where the energy of the plant is concentrated in the spring – new growth. These can be used for salads, tea, soups and tonics. Dandelion leaves are great eaten fresh and can be dried for later use.

To clean them place the leaves in a basin of water and agitate gently. Allow the leaves to soak while the dirt settles to bottom. Remove gently so as not to stir up the dirt in the bottom of the basin. Run the soaked leaves under running water. Place in a colander to drain.

FLOWERS
Flowers should be harvested after the dew has dried, but before heat of the day – in late morning. The flowers won’t open on a cloudy day. As soon as rain threatens, the heads will close. The blooms also close at night (or late afternoon) and open again when the plant senses the sun’s rays.

To harvest the flowers, pull on the sepals (green leaves at base of bloom) and the blossoms will pop off the stem, saving you the trouble of removing stems later. Clean them just as you would the leaves.

ROOT
Dandelion roots can be eaten fresh or dried. The best quality roots grow in well-cultivated soil. They form a slim, carrot-like tap that is twisted and brittle, milky white in color and seated deep in the soil. When unearthed, the plant will reproduce from broken remnants of root left in the ground.

Harvest roots in mid-summer as this is the part of the year when they are thought the least bitter. These are best from free, moist soil located in shady areas. Frosty conditions will lessen the activity of the roots, so it is not good to gather them during cold weather. However, it is not a problem to harvest during wet weather. Use a long fork or trowel and lift steadily and carefully. Try not to break or cut the roots as they will lose their valuable juice by bleeding.

Dandelion roots should be dried whole or cut 3 to 6 inches long if too large. These roots generally take about two weeks to dry. They will shrivel to ½ inch or less in diameter and appear dark brown with lengthwise, spiraling wrinkles. Fully dried Dandelion roots will be hard enough to snap revealing their white interior. Store the dehydrated roots in a dry place to avoid mold and in a tightly covered container to protect them from pests. They will keep for one season.

HABITAT ENRICHMENT
Dandelion nectar attracts butterflies, hoverflies and bees. Finches also enjoy the seeds of this plant.

Learn now to identify safe sources of Dandelion as it is a nourishing food source and a helpful remedy in time of need.
read more “DANDELION: HARVEST OF HEALTH”

Wednesday, March 24, 2010

HOW TO RELEASE A ZIP TIE

Bookmark and Share
Who knew there were three different ways to get out of a zip tie restraint? I didn’t until I looked into it. These skills are fun to use as tricks for amusement. However, if you find yourself being held by bad guys, it can be a lifesaver. Knowing this information may help you resist the urge to panic in a dangerous circumstance. And THAT may be just the advantage you need to get away.

Zip ties are cheap and nearly impossible to break, making them a favorite for human restraints. If your hands are secured in front of you, here is what you need to know to release your binding.

CREATE SOME WIGGLE ROOM

When someone places a zip tie on your wrists, place your hands side by side, palms down, and ball your hands into fists. Flex your chest to enlarge the span of your shoulders. When the bad guys come by to tighten your restraints, they will see that they are snug. Later, when you relax, you should have enough room to release your bindings with a small shim.

A FLAW IN THE DESIGN
Zip ties have a small latch that wedges itself against the teeth on the strip that is pulled through the lock. When the strip is pulled backwards, the latch falls against the teeth and prevents it’s release. A small nail file, eyeglass screwdriver, razor blade, pin or other small object can be used to insert between the teeth and the latch to allow the plastic strip to be pulled out of the lock. If you’ve got enough slack in your bindings, you should be able to insert a shim and release your zip tie.


Here is a video that shows how to release a zip tie using the shim method


Re-use Your Zip/Cable Ties - The funniest movie is here. Find it


REMOVE THE TIE WHILE STILL LOCKED
This method also begins with creating wiggle room. Hold your wrists crossed with the thumbs facing upwards, rather than to the sides. This enlarges the circumference that will be needed to secure your hands. When the zip tie is tightened, move it up your arm by spreading your elbows wide. When you are not being watched, rotate your wrists so that your hands are palms together as if in prayer. Inch the zip tie forward on your hands with the goal of getting one thumb free. Pull one hand through and then the other will slip free easily.

This video demonstrates how remove your hands from a zip tie without unlocking it and how to use it to unlock a door. Not sure the zip tie had anything to do with the hair. :teef:


BREAK THE LOCK
The third method seems a bit counterintuitive. Place your hands together with palms facing and the fingers curled into a fist. Try to have the lock resting on top of your wrists where the two arms meet. Have the tie as tight as possible. Raise your hands to the face or chest level with elbows bent. Then, drive your arms down quickly, past your sides and try to make your shoulder blades touch. This will place force onto the lock that will cause it to snap and fail.

The following video demonstrates how to break a zip tie lock.


As always, this article is offered for information purposes only. The reader should exercise good judgment and assumes all liability when attempting to utilize these methods.
read more “HOW TO RELEASE A ZIP TIE”

Wednesday, February 17, 2010

CRICKETS MAY BE JUST THE TICKET IN A SURVIVAL SITUATION

Bookmark and Share
Crickets can be found in shallow burrows beneath stone or dirt or in tufts of plant material. They are more active at night when the males can be heard calling to attract females for breeding. While most varieties are found in forests and grasslands, crickets can also be found in marshes and seashores as well as caves and trees.

AS A THERMOMETER
You can use the sound of a cricket as a thermometer. If you are in a temperate area that is not hotter than 100º F or cooler than 55º F, then you can tell the temperature by counting the number of cricket chirps you hear in 15 seconds. Add 40 to the number of chirps you hear. The result is the temperature in Fahrenheit. If you wish to know the temperature in Celsius, determine the number of chirps you hear in 25 seconds, divide that number by 3 and then add 4.

AS A LURE
Crickets can be used as live bait to secure a satisfying meal of fresh fish. Cricket fishing is most effective in small lakes and within 15 feet of shore.

Once you’ve located a cricket and secured your hook to the fishing line, bait your hook with the live cricket. Hold the cricket firmly between your thumb and fingers while you insert the hook held in your other hand. Some instruct that the barb of the hook should be inserted into the thorax behind the cricket’s head, pressed through the length of the cricket's body and exited via the rear end just under the tail. However, experienced cricket-bait fishermen tell me that they prefer to insert the barb into the rear, just under the tail and thread it through the length of the body, exiting through the thorax, near the head. This method keeps fish from sucking the cricket off of the hook, robbing you of your meal AND your bait.


If you locate an empty can, it can be converted into a makeshift reel. Toss your baited hook into the water, making sure to keep a firm hold on the free end of the line. Reel in your line by wrapping it around the can. Repeat until you have your fish.

AS A FOOD SOURCE
Compared to cattle raised for food, a cricket can reproduce nearly 20 times faster. Within 3 to 4 weeks, a female can lay over a thousand eggs. Crickets can thrive using a fraction of the space and food required to produce an equivalent amount of consumable meat from other livestock. When compared to meat production by chickens and pigs, crickets were twice as efficient. They are able to provide meat at four times the rate of sheep, and six times the rate of cattle when allowances are made for carcass trim and dressing.

Crickets as a food source can offer a significant source of many nutrients and protein. Nutritionally, 100 grams of cricket meat is 21% protein, 6% fat and 3% carbohydrates along with 21 mg of calcium. Per gram of dry weight, cricket meat provides 63 to 122 mg of fatty acid which includes linoleic acid and a-linolenic acid as well as copper, iron and magnesium. This is produced while they consume table scraps.

CRICKET ROUND-UP
The Paiute people used to harvest crickets by digging a series of large trenches. These were covered with dry straw. Large numbers of crickets would be herded into the trenches. The straw was then set aflame, roasting the crickets alive. The women would then gather bushels of the cooked bugs and take them home to grind into protein-rich flour for bread.

RAISE YOUR OWN
One way to ensure a ready supply of crickets that have not been exposed to chemical sprays is to raise your own. Keep them in an aquarium with a couple of inches of soil on the bottom. Place egg cartons inside for roosts. Moistened cotton balls will provide them with water. Leave grated bits of vegetable and grain scraps for them to eat, making sure they have a ready supply of fresh foods. Every few days, mist the soil lightly. Make sure the lid is tight-fitting and secure as crickets are known for their ability to escape their confines and will attempt to do so whenever the lid is opened.

PREPARATION
Take the desired quantity live crickets and place them into a colander or other container with drain holes. Cover the container quickly with a piece of wire screening or cheesecloth to keep the insects from escaping. Rinse them thoroughly by running water over them. Dry them by shaking the colander until the water no longer drips. Place the crickets in a sealed container and place this in the freezer for about 15 minutes. This will be long enough to kill them, but not long enough to freeze them. Remove them from the freezer and rinse them again. Cricket's heads, hind legs, and wing cases can be removed according to personal preference. The legs will tend to get stuck in the teeth and could be painful to swallow. The crickets can then be eaten raw, roasted, or dehydrated to be incorporated into your favorite recipes.


CAUTION
Whatever your method, care should be taken when harvesting crickets for food. Don’t collect insects near residential areas as they may have been contaminated by herbicides or insecticides.


Below Ray Mears demonstrates using a can as a fishing reel.
It's towards the end of this short video:


read more “CRICKETS MAY BE JUST THE TICKET IN A SURVIVAL SITUATION”

Kay is . . .

a perpetual student of things I find interesting and (I hope) helpful to others. Feel free to use and apply all information with a healthy dose of common sense. :-)


Search By Category


References & FUN

CLICK THE COUPON 2 VISIT iHERB

iHerbButton

ADD KAY 2 UR LIST!

No Greater Joy!

NGJbutton