Kay's Picks

    ↓ WHY I USE iHerb ↓


    Wonderful Readers!

    NETWORK READERS

Showing posts with label safety. Show all posts

Monday, June 4, 2012

THE TRUTH ABOUT EXPECTATIONS OF PRIVACY ON THE INTERNET

Bookmark and Share
You may have noticed the following posted in the status line of many users of social media:

For those of you who do not understand the reasoning behind this posting, Facebook is now a publicly traded entity. Unless you state otherwise, anyone can infringe on your right to privacy once you post to this site. It is recommended that you and other members post a similar notice as this, or you may copy and paste this version. If you do not post such a statement once, then you are indirectly allowing public use of items such as your photos and the information contained in your status updates.

PRIVACY NOTICE: Warning - any person and/or institution and/or Agent and/or Agency of any governmental structure including but not limited to the United States Federal Government also using or monitoring/using this website or any of its associated websites, you do NOT have my permission to utilize any of my profile information nor any of the content contained herein including, but not limited to my photos, and/or the comments made about my photos or any other "picture" art posted on my profile.

You are hereby notified that you are strictly prohibited from disclosing, copying, distributing, disseminating, or taking any other action against me with regard to this profile and the contents herein. The foregoing prohibitions also apply to your employee , agent , student or any personnel under your direction or control.

The contents of this profile are private and legally privileged and confidential information, and the violation of my personal privacy is punishable by law. UCC 1-103 1-308 ALL RIGHTS RESERVED WITHOUT PREJUDICE.

The reality is that expectations of privacy by the user are outlined in the 'privacy policy,' 'terms of privacy,' 'legal terms,' and other such legal notices that you show you've read and agreed to when you establish a profile with various online sites. This includes Facebook, but also other sites. If you haven't already negotiated a modified agreement before signing up, you can only delete your account. Otherwise, any information you disclose while a member of that site is subject to the terms to which you've already agreed.

Posting a notice like that above will not protect your privacy or negate your contract. But protection from snooping by businesses and government entities is only half of the equation.

Anyone on your friends list could accidentally compromise your personal information by disclosing it. Often this is done without malice. However, once you've posted information, you have no control over how viewers of that information use it. An example of this may be a funny picture you post of your child. A friend likes your photo on his or her wall. A friend of that friend shares the image. In a flash, a personal family moment is being scrutinized by strangers.


If you'd like more information on internet privacy and security, read INTERNET SURVIVAL: PROTECTING YOUR PRIVACY.
read more “THE TRUTH ABOUT EXPECTATIONS OF PRIVACY ON THE INTERNET”

Thursday, July 14, 2011

4 STEPS TO SAFE DRINKING WATER

Bookmark and Share
Humans and animals must have water to survive. Securing a safe source of water takes time. Consider how to best invest your resources well ahead of a crisis point. When standard clean water sources are unavailable, here are some ways you can help secure safe drinking water.

1. SELECTION
Choose the cleanest water you can find. Look for a water supply that does not have any obvious debris floating in it. Check to be sure dead animals, sewage, or other bits of organic matter are not easily seen in your water source. Locate a source that hasn't been contaminated by chemical spills.

Some people believe that exposure to various water sources will give you immunity to disease-carrying microbes, making it possible for you to safely drink unfiltered water while traveling. The reality is that some microbes could wreak havoc with your health and cause severe physical damage. There is some truth that limited exposure can build immunity. It is also true that no one wants to become ill unnecessarily. Avoid chemically contaminated water sources as these hazards cannot always be filtered from the water. Don't take risks if you don't have to do so.

2. FILTRATION
Filter the water you collect. There are many ways that water can be contaminated. Not all contaminants are visible. Select a method of filtration to further insure the safety of your drinking water.

With water filtration, there are a range of options from bad to better and best. No single option is practical in every application. Everything from the temperature, sunlight, terrain, individual skill levels and materials on hand will play a role in the safety of the water you consume. Preparation and information is the key to keeping your water supply a source of health rather than a hazard.

3. DISINFECT
Disinfect the filtered water to kill any remaining disease carrying organisms. Once you’ve selected and filtered your water, you will want to heat it to the point of pasteurization. This is about 150 degrees Fahrenheit, several degrees below the boiling point.

Using pasteurization helps to avoid loss of water vapor by boiling. Pasteurization can be done using sunlight by leaving a sealed transparent container of water in direct sunshine from two to four hours. The time depends on the heat of the sun and the surface on which the container is resting.

Without a thermometer, it may be easier to heat the water to boiling to insure it’s disinfected. Use a lid or covered container to avoid loss due to steam. Distilling water by boiling and drinking the condensed steam is the safest way to consume clean water from questionable sources. Proper water distillation insures that the contaminants are left in the original vessel while only pure water moves to the catch vessel.

4. STORAGE
Use safe storage methods. Good drinking water can easily become contaminated by exposing it to a tainted container. If plastic containers have been used for toxic chemicals, it is possible that the plastic could release some of those chemicals back into your carefully cleaned water. Wash glass containers carefully before re-use. Take the time to cover containers to protect the contents from contamination.
read more “4 STEPS TO SAFE DRINKING WATER”

Thursday, April 28, 2011

REASONS TO USE A SMALL PACK

Bookmark and Share
Articles and books on survival regularly offer lists of items should be packed for emergency travel. The overwhelming majority recommend that you pack light. There are good reasons for having few items to carry when you are on the move.

You will have to keep your pack secure. This is more difficult to do if you are encumbered with a large bag. It’s good to be strong enough to heft a good bit of weight, but if your strength is used to carry your pack, you won’t have much left to protect yourself or keep track of your possessions. Additionally, a large, heavy pack is a signal to others that you are on the move. It makes you less anonymous. This can create some difficulties.

A large pack will make it difficult for you to maneuver into and out of tight spaces. If you need to catch a ride or take public transportation, you’ll need extra space for your bag. Not every Good Samaritan has a large vehicle. You’ll not be able to take advantage of two-wheeled conveyances. A smaller pack enables you to avoid storing it in a trunk or a locker. Buses will require you to place a large pack on the roof or in the cargo compartment where you can’t keep an eye on it. You can keep a small bag on your lap and avoid extra fees for a seat to hold an oversized backpack.

If you need something out of a large pack, you may find yourself having to unpack and repack it to get the desired item. The larger your pack, the more cumbersome this process becomes. This can be dangerous if you are trying to get to your medical kit. It’s just a lot easier to have to rearrange fewer and lighter items.

A smaller pack gives you the freedom and flexibility to decide which route is best for you rather than which route you can manage with your large bag. Moderate terrain can become impassable if you must manage it with a heavy pack. Any terrain is easier to traverse with a lighter pack. Rather than use up strength and stamina carrying unnecessary weight, use it to choose the journey rather than let your pack determine your route.

Take the time to notice people outdoors who are moving with freedom. The ones that participate in the most activities have the lightest and smallest packs. Learn how to make use of multiple use items as a way to lighten your load. Information weighs nothing, and it can make a vast difference in the tools you will be able to utilize.


Sean with Silver Fox Bushcraft takes the time in this clip to show what he carries in his pack for hiking and woodland exploration.


David Wendell with Bushcraft on Fire shows how you can create your own kit without a retailed pack.

read more “REASONS TO USE A SMALL PACK”

Thursday, April 7, 2011

INTERNET SURVIVAL: PROTECTING YOUR PRIVACY

Bookmark and Share
Privacy is something that you don't realize you need until you've lost it. Here are some ways to maintain your privacy and relative safety on the internet.

You may be sharing more than just a few cute photos when you post an image on the internet. GPS enabled phones can capture images that can accurately reveal your location. All it takes is a few right clicks of a mouse for someone to copy the coordinates, paste them into Google maps and then map the shortest route to view that loved one or prized possession in person. With social network status lines, you could be revealing your CURRENT location and inviting untold numbers of strangers to join you. It’s important to be aware of this even when well-meaning family members are taking pictures of your children.

This video shows you how to disable the GPS tag on your phone photos.


This video covers some of the other dangers to revealing your location to strangers.


It is best if you don’t make public your full legal name, street address, date of birth, telephone number, or Social Security number.

If asked for your name, use initials. Scramble the letters of your name, use nicknames etc. This precaution will also give you a head's-up if you receive spam. If someone addresses you by anything other than your actual name, you will know that this is not someone you know personally.

Never make your street address public. If it is required, offer only what is necessary. Some sites only require a state or region. Adjust your security settings to keep this information private. Only make online purchases from trusted vendors as you will have to give them your address for shipping purposes.

Keep your birth date private. Sites that require your birth date often do so in order to insure you are an adult. If their security is breached, this is a key piece of personal information that someone could use to guess your social security number. Check your security settings and be sure this information is private. Consider using an online birth date that includes your birth year and an alternative month and date. Or you could use your actual month and date with the year previous or following your actual birth year. This will give the host an accurate gauge of your age without opening you up to unnecessary snooping.

Don’t reveal your home telephone number. Refrain from offering this and keep security settings private if it is included in an online profile. If someone discovers your telephone number and knows your full name and birth date, it is possible for them to use these items to add unauthorized charges to your bill.

Your social security number shouldn’t be given out unless it is absolutely necessary and to a verified financial or medical institution that you called. Always ask if you can offer an alternative number. Decline to give your number to someone that calls you.

Protect portable electronic devices with passwords. Use upper and lower case letters, numbers, and symbols. Don’t tell your device to remember your user name and password. Don’t store financial information on portable devices. Always log off when you’re finished. If your laptop or phone is lost, it’s harder for someone to access your personal information or clean out your accounts.

Internet safety is basically taking the time to cultivate good habits. Posting something on the internet is just like putting something on a very public bulletin board. The time you take now to develop these habits will protect you and your family later.

Bonus tool for readers with children:
Here’s one of my favorite tools for school aged children that want to do internet research. Make Quintura for Kids the home page on your internet browser. This search engine filters out undesirable "adult" content and reviews approved sites regularly. We’ve used it successfully at our house and recommend it to other households with children. It provides a safe way for kids to do searches without awful content and images surprising them. Try Quintura for Kids out for yourself at quinturakids.com.

Note: Quintura won’t prevent users from going to inappropriate internet addresses that they know how to get to. You’ll need another type of filtering service for that application. Check out this article for some additional suggestions for user accountability helps.
read more “INTERNET SURVIVAL: PROTECTING YOUR PRIVACY”

Friday, April 1, 2011

THE PRICE OF PARALYZING FEAR

Bookmark and Share
Strong emotions in charged circumstances bring about visceral responses that are not planned or calculated. These strong emotions are dominant and can cancel out intellectual responses. This is true whether you are dealing with a child delighted with a long-desired gift, a young lady surprised with a marriage proposal, an athlete celebrating a victory, or a person who finds himself in need of rescue.

An experienced teacher will tell you that all learning stops the moment a student becomes overly emotional. A distraught person can’t be expected to make considered logical choices. Whether someone is dancing in delight, or wailing in dismay, unchecked emotions make it impossible for that person to respond in a calculated, intellectual way.

I’ve recently viewed footage of people who have had their cars towed to an impound lot. These individuals must navigate a confusing maze of legal and financial requirements before taking possession of their vehicle. The circumstances are varied, but one thing is common: these people are under stress.

For those who are able to calm themselves, setting aside feelings of victimization and anger, the results are fairly straightforward. They determine what is required for the release of the vehicle, go about getting their affairs and documents in order, and then return to claim their car.

For those unable to calm themselves, the process becomes more tedious and lengthy. They direct their frustration at the workers in the office. Aggressive body language, raised voices and accusations fly back and forth as workers try to tell the car owner what he or she will need. Often, the person only hears one or two instructions before emotionally shutting down. They leave and return several times as they collect one or two of the documents they need each time. The stress level of the worker starts to rise as he or she responds to the upset customer. This leads to mistakes and omitted information on the worker’s part.

Fear impairs mental function in the form of confusion, forgetfulness, and the inability to concentrate. In this state, a person can be numbed by shock, begin to panic, or lash out in anger. When seconds count, a fearful person may cause others in his party to lose their life. It may be necessary to leave him behind for the sake of the group’s safety.

I find that the most recommendations for survival safety focus on two concepts: faith and preparation. The more important of the two is faith. Why? In survival circumstances, the truth you know about God and about man will have a powerful impact on your behavior. A person of faith won’t waste as much time second-guessing and railing against the circumstances.

Faith is the opposite of fear. Faith moves us towards life. Faith reminds us of the One in whom our trust is placed. Faith tells us that we are not alone.

Once your fear response calms, your preparation will kick in. If you’ve practiced thinking on your feet, making decisions on the fly, and dealing with various terrains, you will find yourself well-served by your time invested in these pursuits. However, if you are not able reign in your emotions, all of that preparation may likely do you no good.

I found an account of an interview of survivors of the 2004 Indonesian tsunami. The reporter stated that it occurred to her that everyone sitting in that room lived because they ran to the mountains. Those that did not move immediately died. It reminded me of the scripture that reads, “And let him that is on the housetop not go down into the house, neither enter therein, to take any thing out of his house: And let him that is in the field not turn back again for to take up his garment” (Mark 13:15,16).

Fear used properly can be a lifesaver. As a master, fear can kill. Learn truth. Build your faith and be prepared. When circumstances seem dire, these steps will equip you to respond.
read more “THE PRICE OF PARALYZING FEAR”

Friday, February 25, 2011

DEBI PEARL'S 2ND BOOK ON CHILD SAFETY: SARAH SUE LEARNS TO YELL AND TELL

Bookmark and Share
A children's book about how to stay safe from predators isn't the first choice on most parent's shopping list. We want our children to remain innocent and not live in fear. Isn't part of protecting them shielding them from information about predators?

At first, it sounds reasonable to avoid unpleasant topics with our children. Then I recall how we learned fun rhymes and songs to reinforce safety lessons when I was a child. I can remember being taught how to cross a street LONG before I was ever allowed to cross by myself. Someone decided that knowing how to stop, drop and roll if my clothing caught fire was vital to my well-being . . . . just in case. We weren't allowed to play with matches, but a big talking bear reminded us that only WE could prevent forest fires. We didn't even live near a forest!


That's why I'm so glad to see a children's book that does this same thing. SARA SUE LEARNS TO YELL AND TELL promotes a positive message to children that there are things they can do to stay safe. Without being graphic or going into lurid details, this book encourages children that are approached to immediately alert someone. Debi Pearl's latest children's book gives little ones confidence that God is on their side and there IS something they can do. It's comforting to tell children that there IS a way to respond and they CAN tell someone who will listen.

SARA SUE LEARNS TO YELL AND TELL is a book that reinforces safety for children growing up in today's world. Decades ago, the dangers were different. Today, human trafficking and child predators are common. These hunters hide in plain sight, and they know how to target vulnerable children.

Debi's book helps me remind my children of the ways they can avoid looking like an easy target. Reading SARA SUE with them opens up a dialogue so that they know it's safe to come to me and talk about these issues. The rhyming verse and colorful images are both appealing and entertaining for children. The helps in the back of the book are an encouragement to parents that we needn't be afraid, just prepared.

I'm very grateful that this grandmother took the time to not just teach these lessons to her own family, but that she has reached out to help keep other children safe as well.


Click the button to order:


SARA SUE LEARNS TO YELL AND TELL can be a lifeline to children that don't know how to respond to threats. Senator Scott Brown describes what happened to him as a child.

read more “DEBI PEARL'S 2ND BOOK ON CHILD SAFETY: SARAH SUE LEARNS TO YELL AND TELL”

Thursday, December 9, 2010

GUIDELINES FOR VOLCANO SAFETY

Bookmark and Share
It is best for people that live near a volcano to make plans for an eruption. Learn the alert levels issued by your local emergency management office and know what they mean. Listen for emergency updates and instructions, making note of information about hazards you may encounter. Prepare for a possible evacuation. Make additional preparations to shelter in place.

A volcanic eruption can alter the landscape in ways that are difficult to imagine. Near the site, there can be loss of life, and destruction of structures and property. The resulting ash cloud can cause airports to shut down and turn daylight to darkness. Earthquakes, flash floods, wildfires, thunderstorms and tsunamis can all occur as the result of a volcanic eruption.

Memorize the recommended evacuation routes. Maps marked with this route should be kept in each car and another in your home. Select maps with detailed geographical markings of the area surrounding your location. In the United States, hazard zone maps can be secured from the U.S. Geological Survey that will show probable lava flow paths and give time estimates on travel to certain locations along with their relative safety.

Prepare a getaway kit. Include safety goggles and dust masks or bandannas to protect your eyes and lungs from falling ash. Include long sleeved shirts, long pants and sturdy footwear. Keep a well-stocked first aid kit, blankets and warm clothing in a convenient location. With this, keep a battery-powered radio and fresh batteries so that you can still monitor alerts if your power goes out.

Unless you need to evacuate, stay indoors. Bring pets inside and move livestock into shelters. Close all vents, doors and windows for protection from ash and burning cinders. Put damp towels under doorways. Cover downspouts, machinery, electronic devices and computers to protect them from ash that can disable and clog machinery and pipes.

Listen for creaking noises from your roof. Ash will fall silently and can cause the roof to collapse under its weight. Remember to wear a mask and goggles if you go outside to clear ash off of the roof and gutters. Remove your clothing before re-entering the house rather than bring ash inside where it can irritate the airways of everyone indoors.

Keep at least three days worth of water and food in your home. An eruption can contaminate water supplies and you may have to rely upon what you have stored. If you hear that an eruption is imminent, fill all sinks, tubs and containers with water. Rely upon your stored water until your regular source is deemed safe.

If you must drive, use your headlights, proceed slowly at about 35 mph and watch your gauges for signs of an overheating engine. Ash can clog your radiator and other moving parts of an engine. Ash will also make roads slippery. When parked, cover your vehicle with a tarp and place it under a shelter to protect it from the falling ash.

If you must evacuate, turn electricity and gas off at the mains before you leave. Head for higher ground and try to stay upwind so that ash and gases are blown away from you. Volcanoes’ greatest dangers (lava flows, mudflows, poison gases and flooding) all move towards low-lying areas. An elevated area gives you greater protection than any attempt to outdistance the danger.

Afterwards, don’t return home until authorities say it’s safe to re-enter the area. Seek medical treatment for any injuries. The wait for medical treatment will be shorter for those farther away from the disaster site. When cleaning up property after an eruption, dampen the ash before sweeping or shoveling the buildup. This keeps the slippery substance from getting tossed back into the air.

Remember, in the event of an eruption, you may have only moments to react. Being prepared to move quickly and decisively can mean the difference between life and death.


This 4 minute video shows the extent of the destruction
caused by the eruption of Mount St. Helens.


This 17 second video shows Mount St. Helens
erupting in slow motion.

The entire side of the mountain slides to one side.

read more “GUIDELINES FOR VOLCANO SAFETY”

Tuesday, November 23, 2010

DANGERS DURING A VOLCANO

Bookmark and Share
A volcano is a mountain that opens downward to a reservoir of molten rock. When pressure from gases and melted rock becomes strong enough, the mountain erupts in an explosion that spews gases and rocks through the opening. Volcanic blasts can devastate miles of landscape within hours or minutes. Here are some of the things to watch for during a volcanic eruption.

An ASH CLOUD can turn day to night and prevent you from being able to recognize landmarks, coating everything it touches with a dark powder. It is made up of bits of glass and exploded rocks made under extreme temperatures. This corrosive substance does not dissolve and can damage mucus membranes, irritating skin and eyes. Infants and those with breathing problems are most at risk of injury from this. Cover your eyes, nose and mouth.

FALLING ROCKS (pyroclastics) can land miles away from the volcano. Place a ridge line between yourself and the volcano or hold something (backpack, box, trash can lid, your arms etc.) over your head for protection.

FIRES occur wherever burning debris lands onto tinder, spreading quickly.

FLOODING & MUDSLIDES kill more people than the initial blast. Even miles away, these are a danger as normal waterways are clogged or changed by the lava flow, ash and debris.

HEAT is also released with temperatures high enough to burn human flesh. Move away from the blast area to avoid this.

LAVA FLOWS are super-heated molten liquid. Nothing can stop them. Don’t attempt to cross them even if they appear cooled. This could be a thin crust that will give away under your weight. Never try to cross hot spots, mud holes or geysers as the ground surrounding them can be too thin to keep you out of the molten lava below.

POISON GAS and volcanic smog (vog) is the result of sulfur dioxide and other pollutants reacting with oxygen, moisture and sunlight. It can cause lung damage, breathing difficulties, headaches and death. Use a respirator, mask or moist cloth and get away from the area as quickly as possible. DON’T KNEEL OR CRAWL!!! The most dangerous gases often accumulate near the ground.

STRONG WINDS follow an eruption and can be felt miles away from the blast, knocking over trees and structures.

If you live in the vicinity of a volcano, NOW is the time to develop a plan to deal with events in case of an eruption.


Many Indonesians died in the aftermath
of Mount Merapi's eruptions
during October & November 2010.


read more “DANGERS DURING A VOLCANO”

Saturday, October 23, 2010

FASHION SAFETY FOR WOMEN TRAVELERS

Bookmark and Share
A woman’s travelling attire affects her safety and her social interactions. When a woman presents herself in a way that suggests she isn’t carrying valuables and won’t easily be subdued, she can reduce the chances that she will be accosted. It is worth your time and effort to avoid looking like someone that might invite unwelcomed advances.

NO FLASHY JEWELRY
Wearing expensive jewelry when traveling can make you an attractive target. You could be injured if a thief were to grab a chain from your wrist or neck. A diamond ring may attract unwanted attention. If you MUST wear jewelry, choose something pretty that clearly has no value and turn your ring so that only the band shows.

FOOTWEAR
Choose comfortable, flat shoes that make it easy for you to run. You need shoes that protect your feet and allow you to move quickly. Select comfort and practicality over looks.

RESPECT FOR LOCAL SENSIBILITIES
Be aware of local customs when you travel. You are a guest where ever you go. Dress like one. The locals have had generations to develop a way of dressing that suits the climate and the culture. Learn from their example. Find out what is appropriate apparel for the places you are visiting.

Be modest, casual and comfortable. Consider how you might appear to a predator. Women wearing tight clothing, revealing tops and shorts can invite scrutiny from undesirable characters, lewd comments and attempts to look down shirts. Scantily clad women can also be offensive to residents. When it comes to safety, how you look is more important than your intent.

COVER UP
It isn't necessary for a female traveler to cover her head in most places, but there are places where having a covered head means you will get help easier should you need it. When in doubt cover your head. Lay aside opinions about appropriate dress and carry a bandana, scarf or crushable hat. A willingness to cover can convey respect, prevent prying eyes, and help avoid unwanted attention.

In some communities, bare arms and legs are only acceptable during swimming. A lightweight long-sleeved shirt, jacket or sweater can be wrapped around your waist. It will be available for sun protection or warmth and is easily removed when not needed. If you find yourself in a place where bare arms aren’t permitted, you’ll have a quick and easy slip-on solution.

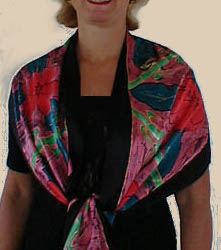
A scarf shows its versatility in this regard. A scarf can be used as a head covering, a shawl or a shrug. If it’s long enough, it can cover your shoulders and your head. A silk scarf can even double as a cover for your motel pillow. In a pinch, it can be folded and used as a sack to carry items.

THINK BEFORE YOU GO
Dressing for safe travel won’t cost you a lot of money, but the time you invest in selecting your garments carefully can be priceless. Instead of drawing unwanted attention, remember that it’s more important to your loved ones that you arrive safely.


In the following clips, Kirsten and Liz discuss how women can dress for safety when traveling. Bulk Herb Store’s Shoshanna demonstrates many ways to accessorize with a scarf.


read more “FASHION SAFETY FOR WOMEN TRAVELERS”

Thursday, September 30, 2010

FIVE POINTS FOR PERSONAL SAFETY

Bookmark and Share
Personal safety has a lot to do with not taking unnecessary risks. While there’s no guarantee that you will never be in an emergency situation, you can take steps to discourage attackers and make rescue more likely. This is an abbreviated list of some things you can do to stay a little safer as you move from place to place.

PREPARATION
• Leave written details of your travel plans with two trusted friends who will notify searchers if you deviate from your itinerary.
• Carry a noisemaker like an electronic device, personal alarm or a whistle. If you have one, use the car alarm button on your key chain.
• Carry a heavy duty flashlight, pepper spray, or even a walking stick. Check laws in your area. In the event of an attack, be prepared to use your choice of device or it could be used against you.

POCKETS
• Avoid carrying a purse or wallet. These are targeted by thieves.
• Use several front pockets for valuables to avoid total loss if robbed.
• Keep emergency money in unexpected places such as shoes, bra, money belt, etc.
• Carry purse or backpack on arm opposite the roadway to make it more difficult for a motorist or bike rider to grab.

PEOPLE
• Walk with confidence keeping your head up, eyes at nose level, alert and with purpose. Attackers look for easy, fearful targets.
• Don’t engage in conflicts that can escalate into physical contact. Criminals sometimes work in packs and try to manipulate someone with a quick temper into striking first. Later, they claim that their assault on your person was self-defense. When you have the option, walk away rather than fight.
Don’t travel alone. Have at least one other person for a walking partner.
• Treat people with respect. Arrogant strutting alienates people that could help you.
• Be willing to learn. Ask questions, seek advice from locals.
• Express gratitude. Say thank you.
• Don’t wear expensive clothing and jewelry unless necessary.
• Avoid drawing attention to breasts, belly or thighs by wearing garments that expose them. Wise clothing choices keep you from being overly attractive to predators and give you freedom to access more locations that may have a dress code. Collared shirts (not sleeveless) and long pants are a good choice for men.

PLACES
• Be aware of your surroundings. Dark lonely places are best avoided. Stay in well lit, populated areas. This is a safer route, even if it takes a bit longer.
• If you see criminal activity occurring, leave the area. Some authorities arrest everyone and ask questions later.
• Public transportation and crowded areas require heightened awareness. These places allow people to jostle and bump into you – perfect opportunities for a thief.
Don’t tune out. Wearing a headset cuts you off from your surroundings, making it easy for an attacker to sneak up on you. When walking alone, don’t listen to electronic devices.

PROTECTION
• Learn some simple, easily performed defense tactics. You don't need to know how to beat an attacker, only how to buy yourself enough time to get away.
• MAKE NOISE if assaulted. Attackers hate attention-making noise. Don't underestimate the power of one person who may come to your aid if they hear you.
Practice yelling at top volume. Tell what is happening, give lots of details and describe your attacker while yelling “Call 911!” Repeat these as often as possible as a command. Witnesses don’t always know what to do and are more likely to respond to instructions than to pleas for help. Your assailants may be so stunned to hear you describe them that they run away.


These short videos below feature Captain Steve Pearl
who elaborates on more safety measures that anyone can employ.


read more “FIVE POINTS FOR PERSONAL SAFETY”

Saturday, July 31, 2010

5 WAYS TO GET ALONG WITH DIFFICULT PEOPLE

Bookmark and Share
Some people are just easier to work with than others. In a survival situation, lives can depend upon successfully navigating a challenging relationship. These methods can help.

FIRST – REALIZE THAT YOU AREN’T THE ONLY PERSON WITH THIS PROBLEM.
Many difficulties arise when someone is convinced of his ‘chronic uniqueness.’ This is the belief that one’s history, circumstances, wants, needs, requirements and desires are so different that no one could possibly understand or be trusted to make decisions affecting him. Telling this person he is mistaken will place him on the defensive and cause more time-consuming conflict. Recognize this self-deception for what it is and avoid taking offense when you see it in others while guarding against it in your own thinking.

SECOND -- DON’T EXPECT OTHERS TO SOOTHE YOUR EMOTIONS.
Others shouldn’t have to listen to you whine. It sounds harsh, but lives could be at risk. Your companions don’t need to be reminded of your emotional turmoil at every opportunity. Your willingness to avoid complaining will add to your value as a team member. Save the details of your inner struggles for a journal. Communicate information as it is necessary. Endeavor to be an encourager. Conversing about the positive points of your circumstance is a way to redirect your thoughts while helping others.

A mural in the rotunda of Oregon's State Capitol
shows the Lewis and Clark Expedition
arriving at Celilo Falls on the Columbia River in 1805.


THIRDACCEPT YOUR RESPONSIBILITY IN THE MATTER.
If you habitually blame others for conflict, it places the group dynamic at risk. It ISN’T just the other person’s problem. Red flags that you are contributing to difficulties are if someone avoids your company, finds excuses for leaving the area when you arrive, or routinely discounts your input. If this is the case, here are a couple of steps that may help:

STEP ONE: Stop spreading the dirt.
When people discuss their difficulties with others, it is in your best interest to change the subject and not take part in such conversations. If your team member suspects you are speaking about him, it will cause a rift. This broken trust can lead to resentment that is displayed in actions and attitude. Your companion becomes just what you painted him to be by responding to your damaging words.

STEP TWO: Focus on strengths and abilities.
Look for opportunities to say something genuinely positive about your team member. Do this even if he is not within earshot. It helps YOU to take inventory of strengths and abilities rather than cataloging irritating traits. Refocus your thoughts when you find yourself falling into this habit. This will help you be less abrasive towards this person without having to put on a front.
FOURTH – DON’T OFFER PLATITUDES AND EXPECT A GOOD RESPONSE.
Many people think social niceties are essential for good group dynamics. A crumbling group dynamic isn’t helped when pleasantries are extended without underlying goodwill. Nice manners ALONE aren’t enough to smooth over serious fractures – and poor manners aren’t a serious enough offense over which to engage in a bitter battle.

FIFTH – BE WILLING TO LOSE THE BATTLE IN ORDER TO WIN THE WAR.
Often, both parties are too proud, too bitter or too hostile to reconcile their differences. Remember, the goal is to survive, not to be proven right. Don't nag or pressure others to conform to your way of thinking. It’s true: ‘A man convinced against his will is of the same opinion still’ -- AND . . . he’s pretty ticked off at being manipulated.

When you set an example of flexibility and refuse to hold grudges, you inspire others to follow your lead. Set aside behaviors that cause conflict and demonstrate your willingness to contribute to the welfare of the group. Your willingness to patiently make an effort to get along can help make the best of a bad circumstance.
read more “5 WAYS TO GET ALONG WITH DIFFICULT PEOPLE”

Monday, June 14, 2010

MEASURING DAYLIGHT BY HAND

Bookmark and Share
When you are outdoors or living with limited (or no) electricity, tasks are measured by how much daylight remains. Light from the sun is necessary in order to accomplish many duties. Knowing how much natural light remains in the day will tell you how to set your priorities regarding things such as shelter and fire.

This is important, especially if you are accustomed to a routine that includes things like a late evening meal with time to relax afterwards. The preparation and cleanup will best be done while the sun is still shining and you are able to see what you are doing. It is NO FUN to wake up the next day to soiled cookware because there wasn’t enough light to do the job right the night before. Ask anyone that has tried to set up a shelter in the dark, and you will quickly hear enough stories to make you want to avoid that scenario also.

To estimate how much daylight remains, locate the sun in the sky without looking directly at it. Fully extend your arm and turn your hand to look at your palm with your fingers pointing to the side. Measure how many finger-widths of space there are between the bottom edge of the sun and the horizon line. For every width of a finger you can place between the sun and the horizon, there is approximately 15 more minutes of daylight. So, if you had a single span of your hand between the sun and the horizon, there is about an hour (4 fingers X 15 minutes) before sunset.

In the morning hours this method can be used to estimate how much time has passed since sunrise. Additionally, measuring the distance of the sun from both the eastern and western horizons, will give you a good general idea of the length of time you will between have sunrise and sunset. Half of that time will give you the hours between sunrise/sunset and mid-day. This valuable tool will help you avoid becoming so consumed with any single task that you run out of time to accomplish other important things.
read more “MEASURING DAYLIGHT BY HAND”

Thursday, May 20, 2010

SWEATING IN A SURVIVAL SITUATION

Bookmark and Share
Thermoregulation is a skill that is valuable to have in an outdoor situation. Thermoregulation is the ability to keep body temperature within certain boundaries, even when the ambient temperature is very different.

A first step towards thermoregulation is to remain calm. A panicked person will have an increased heart rate and the urge to move quickly. The reason to avoid this is because heavy activity will cause the body to perspire and lose valuable water. Additionally, sweat will dampen clothing. Wet clothing will speed hypothermia after sunset, when temperatures begin to fall. This is a consideration EVEN IF you are in the middle of the summer season because evening temperatures can rapidly decline. Perspiration dampened clothing can contribute to skin irritation and blisters.

Knowing how to heed your body’s signals regarding thermoregulation is a life-saving skill. If you begin to perspire, loosen and remove outer garments. This will help keep clothing and skin dry. Watch members of your group and encourage them to remove layers also. If you find that the temperatures are very warm, a dampened cloth across your neck is one method that will help you avoid heat exhaustion.

Avoid working at full capacity as this will create a greater need for drinkable water to replace the hydration you have lost. Work at 60% of your capacity – the point just before you break into a sweat. In a survival situation, it is better to learn the art of steady, plodding activity that brings gradual results, rather than racing to finish each task.

Using this method, construct a shelter, make a fire and prepare for nightfall. When the temperatures drop, re-apply the extra clothing that was not needed during the day.


The following video by Spencer Two Dogs discusses Thermoregulation.


read more “SWEATING IN A SURVIVAL SITUATION”

Wednesday, March 24, 2010

HOW TO RELEASE A ZIP TIE

Bookmark and Share
Who knew there were three different ways to get out of a zip tie restraint? I didn’t until I looked into it. These skills are fun to use as tricks for amusement. However, if you find yourself being held by bad guys, it can be a lifesaver. Knowing this information may help you resist the urge to panic in a dangerous circumstance. And THAT may be just the advantage you need to get away.

Zip ties are cheap and nearly impossible to break, making them a favorite for human restraints. If your hands are secured in front of you, here is what you need to know to release your binding.

CREATE SOME WIGGLE ROOM

When someone places a zip tie on your wrists, place your hands side by side, palms down, and ball your hands into fists. Flex your chest to enlarge the span of your shoulders. When the bad guys come by to tighten your restraints, they will see that they are snug. Later, when you relax, you should have enough room to release your bindings with a small shim.

A FLAW IN THE DESIGN
Zip ties have a small latch that wedges itself against the teeth on the strip that is pulled through the lock. When the strip is pulled backwards, the latch falls against the teeth and prevents it’s release. A small nail file, eyeglass screwdriver, razor blade, pin or other small object can be used to insert between the teeth and the latch to allow the plastic strip to be pulled out of the lock. If you’ve got enough slack in your bindings, you should be able to insert a shim and release your zip tie.


Here is a video that shows how to release a zip tie using the shim method


Re-use Your Zip/Cable Ties - The funniest movie is here. Find it


REMOVE THE TIE WHILE STILL LOCKED
This method also begins with creating wiggle room. Hold your wrists crossed with the thumbs facing upwards, rather than to the sides. This enlarges the circumference that will be needed to secure your hands. When the zip tie is tightened, move it up your arm by spreading your elbows wide. When you are not being watched, rotate your wrists so that your hands are palms together as if in prayer. Inch the zip tie forward on your hands with the goal of getting one thumb free. Pull one hand through and then the other will slip free easily.

This video demonstrates how remove your hands from a zip tie without unlocking it and how to use it to unlock a door. Not sure the zip tie had anything to do with the hair. :teef:


BREAK THE LOCK
The third method seems a bit counterintuitive. Place your hands together with palms facing and the fingers curled into a fist. Try to have the lock resting on top of your wrists where the two arms meet. Have the tie as tight as possible. Raise your hands to the face or chest level with elbows bent. Then, drive your arms down quickly, past your sides and try to make your shoulder blades touch. This will place force onto the lock that will cause it to snap and fail.

The following video demonstrates how to break a zip tie lock.


As always, this article is offered for information purposes only. The reader should exercise good judgment and assumes all liability when attempting to utilize these methods.
read more “HOW TO RELEASE A ZIP TIE”

Saturday, January 16, 2010

EARTHQUAKE SAFETY

Bookmark and Share
When the earth begins to move seconds are crucial. There isn’t time to panic AND survive. Choose to act and live. If you can feel a tremor, you are close enough to the epicenter (or blast) for there to be structural damage in your area. Depending on where you are located, the following guidelines may help save your life.

BASIC RULES
Keep a flashlight and sturdy shoes within reach of your bed and your work place. At home, keep clothing you can quickly put on within reach of your bed. If you are in bed when the shaking starts, remain in bed until the tremor is over. Once the shaking stops, put on your shoes and clothing. Broken glass will easily slice through bare feet (or casual/dress shoes) and hinder your efforts to get to safety.


DUCK * COVER * HOLD

IF YOU ARE INDOORS crouch near an interior, load bearing wall. Place yourself beneath a study object (table, etc.). Protect your head and neck with your hands. Brace yourself by hanging onto whatever you are beneath.

IF YOU ARE IN A TALL BUILDING duck under a sturdy object. Cover your head and neck with a hand. Hold onto whatever you are ducking underneath for stability. When exiting, always use the stairwells. NEVER use elevators during earthquake or fire.

IF YOUR ARE OUTDOORS
Observe where the large trees and power lines are located. These could be falling hazards. Avoid these or any other overhead hazards. Look for an open space where you can avoid falling debris. In the city you should avoid standing near high buildings. As much as 2 to 13 feet of glass could cover city streets below high rise buildings.

IF YOU ARE IN YOUR CAR
Stay in your car. Try to position yourself away from overhead hazards. Don’t park underneath an overhang. If you ARE stuck under a bridge in your car, remain in the car during a tremor. Tires will act as a cushioning (and insulation) if heavy debris fall onto your automobile. If you are on an open roadway, pull over to the side of the road (don’t block the road). Wait for the shaking to stop. Listen to your radio for reports & instructions.

AFTER THE SHAKING STOPS
Expect aftershocks; be prepared to repeat the DUCK, COVER & HOLD. Make sure you are okay. Get a flashlight. Flashlights are much safer than candles in the event of gas leaks. Account for everyone in the household (if at home). Get everyone out to safe place – pre-determined meeting place. Then, take a lap around the house to assess the damage to property – any large cracks, foundation movement, does the house look askew?

Don’t turn off natural gas until instructed by authorities. Listen to AM radio for updates/news from the Emergency Broadcast Network regarding where to go for help.

Don’t forget to locate your pets. Try to calm and re-assure them. Place them on a leash or restraint for several hours until you are SURE they are calm and not prone to running away. This can also help keep them from biting because of anxiety.

FOLLOW YOUR INSTINCTS
Use your best instincts regarding disaster safety. Observe the habits of nature around you. Did you know that on Monday, May 5th of 2008, frogs in China began a mass migration that took them across streets and roads? The following Monday, May 12th, central China was rocked by a 7.8-magnitude quake which killed nearly 10,000 people.


USE CAUTION
This article should be used as a guideline. Taking the time to think through your options BEFORE such an event will greatly help you should you ever find yourself in such a position. This information is not a substitute for professional services. The reader assumes all liability when utilizing these measures.
read more “EARTHQUAKE SAFETY”

Monday, January 4, 2010

HERBS AS INCENSE

Bookmark and Share
In the past, certain herbs such as sage and rosemary were burned to cleanse sick rooms. Cedar is a fragrant wood known to have antiviral, antifungal, expectorant, and lymphatic cleansing properties. Pine, Spruce and Fir needles contain shikimic acid, the main ingredient in Tamiflu, which is used to fight the bird flu. Frankincense is also a known to be very effective incense in the treatment of respiratory ailments. Mullein and Eucalyptus leaves are also beneficial herbs that can be used in this manner.

By slowly burning herbs, the essential oils are released into the smoke and carried into the lungs of those that inhale it. If a person is suffering from bronchial inflammation, the beneficial properties of the herb are applied directly to the inflamed tissue.

I know of one woman that had been dealing with such a strong cytokine response during a bout with the flu that she was choking, vomiting and struggling for air. Her husband closed the damper on their wood stove and tossed some Cedar into the fire, filling the house with smoke. Immediately, the cytokine storm stopped. Within 20 minutes, there was no mucus and she felt as though she hadn’t had the flu at all. They have repeated this remedy with the same result on other family members, airing the house afterwards.

American Indian tribes regularly used Cedar to smoke and cleanse their homes. In rustic conditions, smoke can be used to cleanse a person, clothing, bedding or shelter of vermin, molds, etc. Cedar smoke was one of the ways that priests were instructed to cleanse a house where there had been a plague (cf. end of chapter 14 of Leviticus).

HOW TO BURN HERBS AS INCENSE
Using tongs, place a hot coal or ember from a hard wood fire onto a heatproof dish. Place the herbs onto the hot coal and allow the herbs to smolder. Inhale the resulting smoke. The goal is to encourage the plant material to produce smoke, not to ignite into an open flame. This can be accomplished by only using hot coals (rather than fire) and/or by binding the plant material into a tight bundle.

Tightly bundled herbs are called smudge sticks. Some branches, twigs or leaves are supple enough to form into tight braids. Dried leaves can be secured with twine and unbleached paper. To use a smudge stick, hold one end of it to a flame until it ignites. Then the flame is gently blown out leaving the plant material to smolder and smoke. Smudge sticks are handy as it is easy to direct the smoke and they will tend to burn for a longer period of time.


CAUTION
Do not inhale the smoke of any herb or plant material to which you have known allergies. This article is for information purposes only. Readers that incorporate these methods do so at their own risk and should utilize safety precautions. None of this information is a substitute for professional health care.
read more “HERBS AS INCENSE”

Saturday, November 14, 2009

HOW TO START A FIRE WITH A SODA CAN

Bookmark and Share
I don’t think there is a lot of nutritional value in a can of soda, but the can itself could prove useful in a survival situation. It is possible to use an empty soda can to start a fire. In the event you find yourself in need of fire for cooking or heat, a discarded can could prove most beneficial.

The concave bottom of these cans is designed to give strength to the container. It is possible to polish this surface to a high sheen to create fire. The curved reflective surface is able to collect the sun’s rays and focus them to a single point, igniting flammable tinder.

Once you’ve found an empty pop can, utilize materials you have on hand to polish it to a mirrored gloss. If you have the 0000 steel wool – the finest grade – you will be able to accomplish this with just a few minutes of rubbing. You can also burnish the surface with a baking soda paste, toothpaste or a paste made with scouring powder.


Once this is accomplished, you’ll want to finish with a polish. To polish the surface you can rub it with a bar of chocolate, crayons, candles, Vaseline, or any other waxy material. Apply the material to the bottom of the can and rub with a cloth, repeating this process until you’ve gotten the desired effect. A word of caution, don’t eat the chocolate after it is used for this project as it will have absorbed the aluminum a known toxin.

When the surface has a mirror finish, point it toward the sun. To find the focal point, hold a small scrap of paper between the can and the sun, moving it closer or farther away from the can until the sun’s rays are focused into a small dot of light. Visually mark this spot and hold your tinder there until it begins to smoke and then flame.

You will need about an hour’s time to polish the can’s surface. Igniting your tinder will take less time, depending on the quality of your materials.


This article is provided for information only. The reader assumes all risks and liability in the implementation of these methods and is urged to use common sense and sound judgment in its application.


read more “HOW TO START A FIRE WITH A SODA CAN”

Thursday, October 29, 2009

DUTCH OVEN COOKING

Bookmark and Share
Cooking over an open fire doesn’t mean you have to give up your favorite baked and roasted foods. You might even find that your old favorites are greatly enhanced when cooked in a Dutch oven. When cooking over an open fire, use a Dutch oven with a lipped lid and three feet on the bottom.

DON’T USE METAL UTENSILS
Don’t use a metal utensil on a properly seasoned cast iron pot or pan. Use wooden utensils as metal will remove the nice coating you’ve worked so hard to put there.

THE FIRE
For Dutch oven cooking, use hard wood to build a hot fire at least an hour earlier than your cooking start time. Don’t use ‘soft’ resinous wood or commercial charcoal. Soft, resinous woods (like pine) tend to burn cool and produce a lot of black soot. This is bad for your fireplace and it makes a mess on your cookery – and it’s not so great for the cook, either. Because commercial charcoal is often filled with chemicals and additives that bind them into uniform lumps and increase their flammability, I don’t use them for my cook fire. Learn to build a nice fire with hard wood and you won’t be bothered with either of these. Make sure a good bed of red coals has been laid. Use an oven mitt or cloth to protect your hands as well as a curved iron tool to lift the lid from your pot.

PRE-HEAT YOUR DUTCH OVEN
If needed, wipe the inside of your pot (including the lid) with a paper towel and olive oil. While you prepare your ingredients, place the lid on your Dutch oven and set it near the fire to warm. This is similar to pre-heating your standard oven. Pre-heating your pot will allow the oil to penetrate as the iron warms and allows the food to properly cook. The lid keeps ashes from flying into the pot. If your recipe calls for peppers, onions, or carrots, I add them to the oven at this point to simmer a bit and to provide a cushion between the bottom of the pot and the rest of my ingredients.

ADDING THE FOOD
Prepare your ingredients to be added to the pot. Don’t forget your seasonings. Move your heated Dutch oven a comfortable distance from your fire. Use a curved piece of metal to remove the hot lid.

Add layers of your other ingredients. If you are cooking rice, this is when you would add your water/broth and the rice. Add any additional vegetables. The last ingredient I add is my meat as the juices from the meat will help season the vegetables/rice/potatoes beneath it. Be mindful of the depth of your pot at this point as you don’t want your food to touch the underside of your pot’s lid. If you are baking bread or a desert, place the batter/dough/ingredients into the pot just as you would before placing it into a regular kitchen oven. Replace the lid.

ADD THE COALS
Use a shovel to move some hot coals to the edge of the fire into a small pile. I find that this makes things much more manageable than trying to place the Dutch oven into the fire. Set your Dutch oven on onto this small bed of coals and then begin to shovel hot coals onto the pot’s lid. Once you’ve evenly covered the lid with hot coals, and made sure there is a good bed beneath, shovel a bit of ash over the live coals. This is called banking your fire. It allows the coals to retain their heat as they burn slowly because they aren’t exposed to too much oxygen.

Allow your food to cook about the same time as you would in a conventional oven (assuming you have a good bed of coals), possibly 10 minutes more. Use your shovel to remove the live coals from the top when finished. A whisk broom can remove any ash dust. Using a pad, lift the pot by the handle, protecting your hand from the heat. Move the vessel off of the live coals and set it away from the fire. Lift the lid with a sturdy piece of curved metal and set it to the side. Check your food. If done, serve with a wooden serving spoon. If not, replace the lid, return the pot to the small bed of coals it sat on previously, replacing more coals onto the lid. Wait a few more minutes and check again.

If your first try results in a bit of burned crust, that’s fine. You will soon get the hang of it. The wonderful aroma of hot food will soon silence the critics that will gladly eat around the burnt edges. There aren’t often leftovers. They are ready to eat!

CLEAN UP & STORAGE
For cleanup, gently remove any food residue from the pot with a soft sided scrub pad or wooden spoon. Eventually, you’ll likely find that a clean towel will easily do the job. If there is baked on residue, simply set the emptied pot next to your fire again and allow the remaining bits to cook to ash. Never put your Dutch oven through a dishwasher or immerse it in soapy water. This will strip it of its protective seasoning. Simply wipe the pan and recoat it with oil. You should be able to see your reflection in the bottom of your Dutch oven. Replace the lid for storage.

>>--->WANT TO LEARN MORE?<---<<

Learn about HARD CORE survival in the wilderness with PRIMITIVE WILDERNESS SKILLS, APPLIED. This DVD is offered by the Bulk Herb Store and would make a GREAT gift for the survival skills enthusiast in your life. Additionally, the new best-selling book by Debi Pearl THE VISION offers a wealth of information on herbal medicine. Why not combine the two and purchase THE VISION during the upcoming Barnes & Noble Blitz November 3rd & 4th? If you purchase THE VISION on those dates from Barnes & Noble, you’ll receive free gifts and 25% off coupon off of ANY product offered by The Bulk Herb Store. That means you could get PRIMITIVE WILDERNESS SKILLS, APPLIED at a deep discount! Additionally, you’ll be able to shop at five other vendors with that same discount. Just purchase THE VISION on November 3rd or 4th from Barnes & Noble, email melcohen@hughes.net your receipt (showing the date of purchase) and you’ll get all the details. Plan now to save when you buy THE VISION from Barnes & Noble, November 3rd or 4th -- NEXT WEEK!


The following video is a demonstration of bread-making using a Dutch oven. While the footage shows use in a conventional oven, the technique is the same -- except for the fact that you'd be using fire as your heat source as described above:

read more “DUTCH OVEN COOKING”

Kay is . . .

a perpetual student of things I find interesting and (I hope) helpful to others. Feel free to use and apply all information with a healthy dose of common sense. :-)


Search By Category


References & FUN

CLICK THE COUPON 2 VISIT iHERB

iHerbButton

ADD KAY 2 UR LIST!

No Greater Joy!

NGJbutton